The Moodle Scheduler module helps you to schedule one-on-one appointments with your students. You specify the time slots and length of each slot. Students will then book themselves into one of the available time slots.
This is a great way to allow students to schedule office hours or other meeting times. There are two parts to setup the Scheduler – step 1 – setup the structure, step 2 – setup the appt slots.
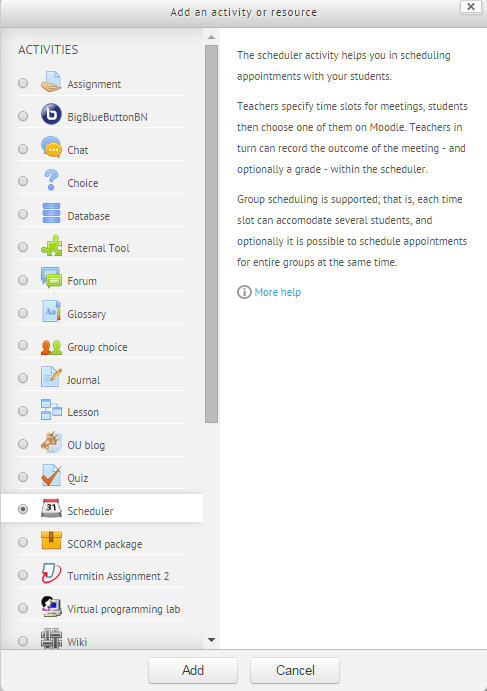
Step 1: Creating the Scheduler Structure
1.Click the Settings (wheel) icon and click Turn editing on in the upper right corner of your course page.
2. Click one of the Add an activity or resource drop down menus and click Scheduler.
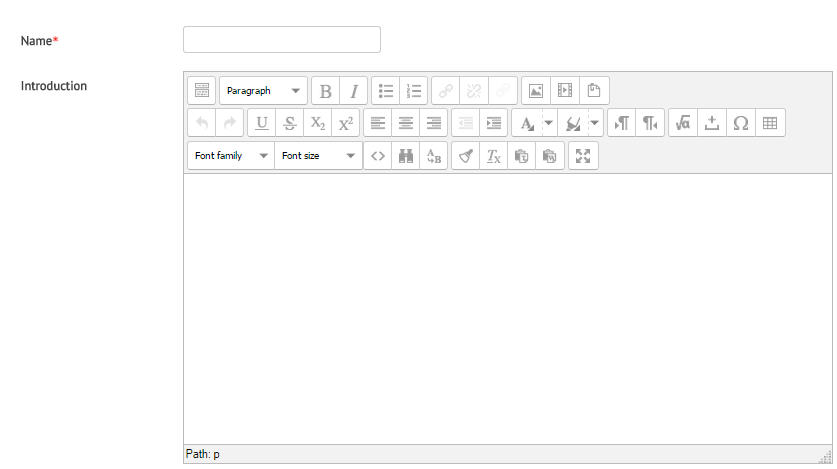
3. Give it a Name and an Introduction, if so desired.
4. Under Options, set your desired settings for:
- Mode (select how many students can register appointments at a time or in the scheduler)
![]()
- Group Booking
- Guard time (disallow changes prior to meeting time)
- Default slot duration time
- Notifications on (both teacher and student)
- Notes

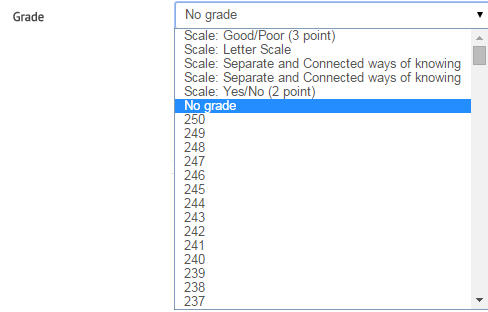
5. You have the option of setting a grade for the scheduled meeting. You might choose to do this if the meeting is a required part of participation. (the default is set to NONE)
6. If you want to setup a Booking form, expand that section and enable Use booking form, then enter Booking instructions.
7. When finished, click Save and display to see the scheduler panel and begin Step 2.
Step 2: Setting up specific time slots
1. To set up time slots, click Add slots ( for recurring slots, choose “Add repeated slots” and for a single time slot, choose “Add single slot”.

2. For recurring time slots, select the date range and days on which appointments will be available. Then set your appointment time range. See example below:
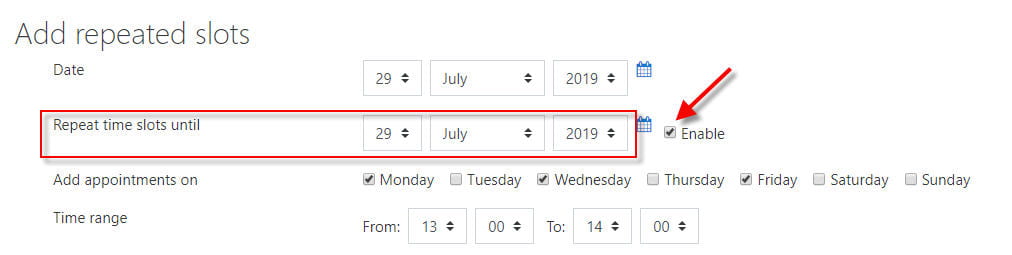
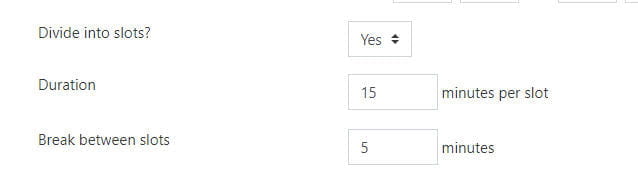
3. Next, you’ll want to set the Divide into slots to Yes and set your Duration and Break between slots. (if you don’t set a break, you will have back-to-back meetings)
4. Then, you’ll need to decide if you want to:
- allow multiple students per slot
- reuse slots
- specify a location
- timing to display appointment to student(s)
- email a reminder
Also, make sure your name is listed under the Teacher category.

5. When you are finished, click Save changes.
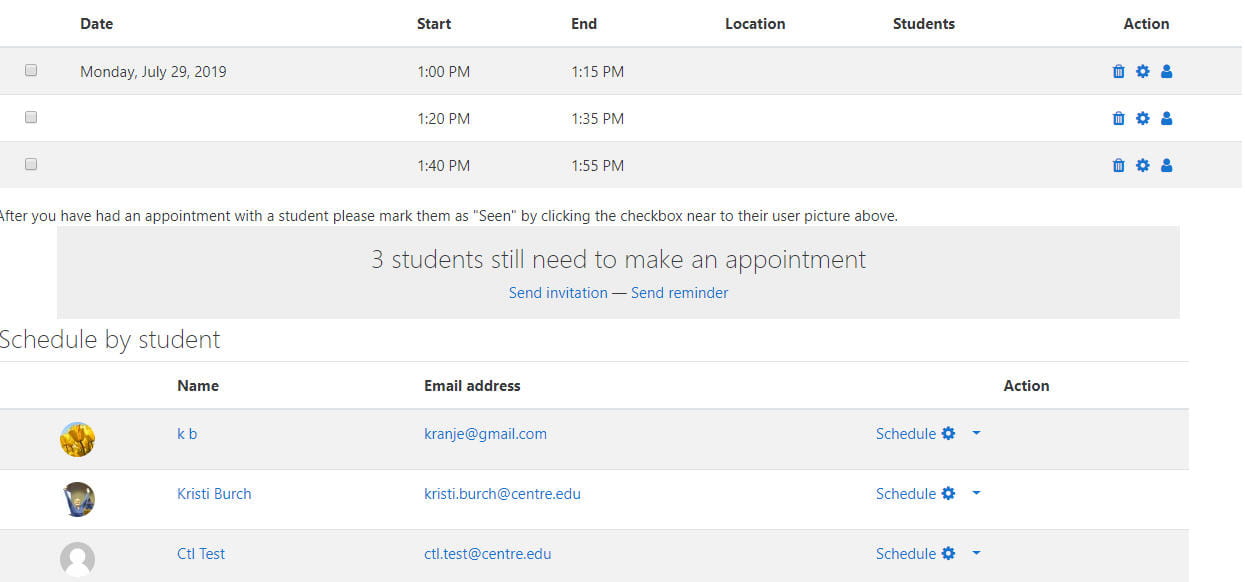
This is what will be shown to students based on your settings. ( you’ll have the option to manually schedule students or allow them to schedule themselves.)
Student View
This is what the student sees
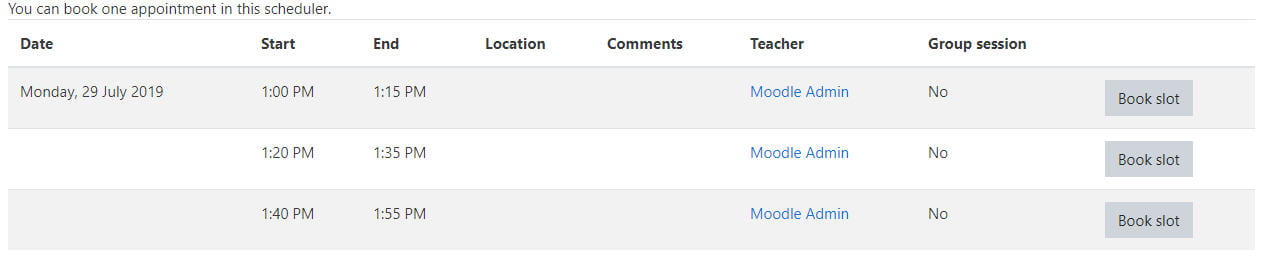
To book a slot, students simply clicks Book slot.
What instructor sees after student booking
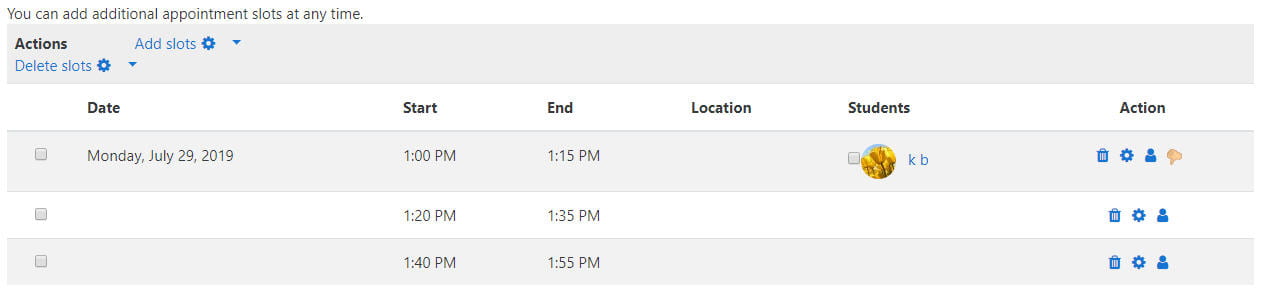
To mark students as seen:
Click the checkbox next to student name.
