Adding and Editing Categories
Adding a category
1. First, go to the gradebook by clicking Grades from the Navigation Menu at the top of your course page.
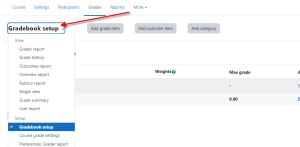
2. From the drop down menu on the left side of the page, choose Gradebook setup.
3. Click the Add category button and give the category a name.
4. When finished, click the Save changes button at the bottom of the page to return to the categories and items page.
* We’ll set weights on the main Gradebook setup page.
Adding and Editing Items
Adding an item
1. First, go to the gradebook by clicking Grades from the Navigation Menu at the top of your course page.
2. From the drop down menu on the left side of the page, choose Gradebook setup.
3. Click the Add grade item button.
4. Give the item a name and fill out the other fields as desired. You can use the “Grade category” drop down menu to select the category you would like the item to be graded in.
5. When finished, click the Save changes button at the bottom of the page to return to the categories and items page.
Moving items to a category (if you forgot to select a grade category when adding an item)
1. On the Gradebook Setup page, select the items that you would like to move into a category by checking the box in the far right column for the item.
2. At the bottom of the page, use the “Move selected items to” drop down menu to select the destination category and the item will relocate to the selected category.

*Adding item as Extra Credit
To add an item as Extra Credit, click on the “Edit” drop down arrow to to right of the assignment. Choose Edit Settings. Below the weight information, check the Extra Credit check box and click Save Changes.