Wikis can be used in class as a collaborative tool for creating group web content. The entire class can work on a document or project together, or students can each have their own wiki and work on it with you and their classmates. There is also the option to use wikis using Moodle Groups.
To Setup a Wiki
1. Click on the Settings (wheel) icon and click Turn editing on in the upper right corner of your course page.
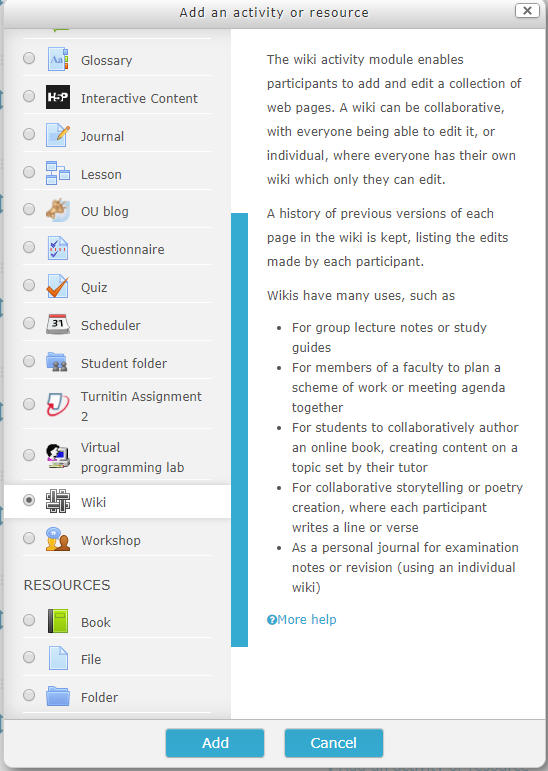
2. Click one of the Add an activity or resource links and select Wiki from the list.
3. Type a name for the Wiki and a description of the assignment, if you like.

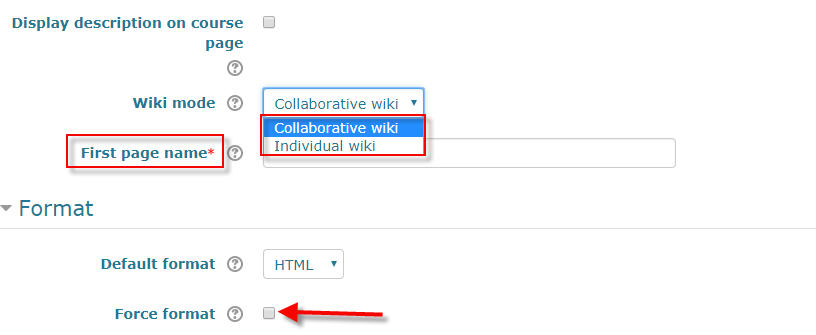
4. Give the first page of your Wiki a name and choose the Wiki mode. Leave the default format as HTML and Check Force format.
5. Click Save and display. Students can now create pages and edit the wiki.
Student editing of wiki pages
- Click on the Wiki assignment in the course page
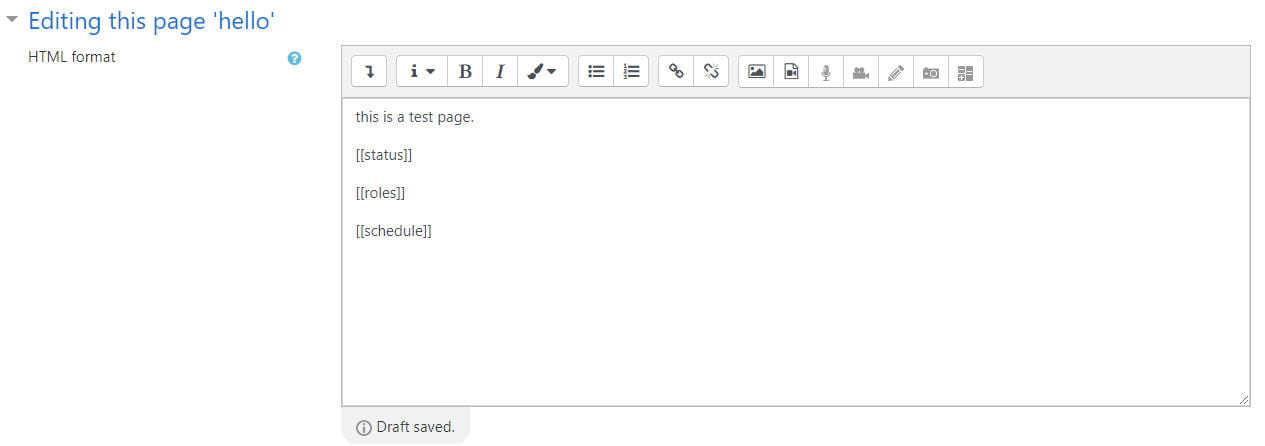
- To edit existing wiki page, begin typing content into the box provided.
- To create additional wiki pages, use [[type text here]] format to create a new page, then click Save.
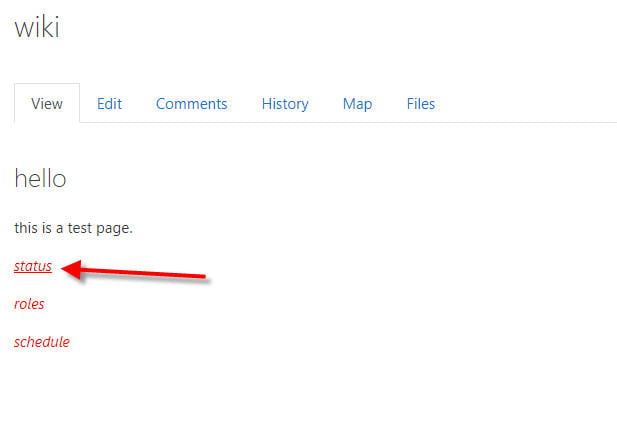
4. To edit newly created wiki pages, click on one of the links to “create” the new page.
5. Click Create page to create the new page and enable editing.
6. When finished, click Save.
For more information about wikis within Moodle, see http://docs.moodle.org/35/en/Using_Wiki