There are two parts to setting up a Quiz (Step 1- setting up the quiz shell and administrative settings, Step 2 – adding the quiz questions)
Step 1 – How to create a quiz
1. Toggle Edit Mode on.
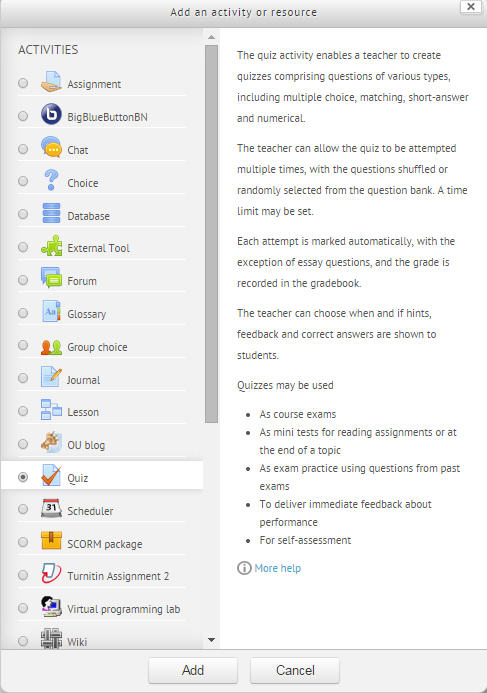
2. Click one of the Add an activity or resource drop down menus and select Quiz from the list.
3. Give your quiz a name and a description (if desired).
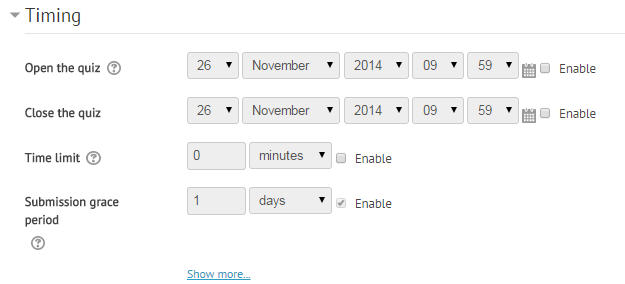
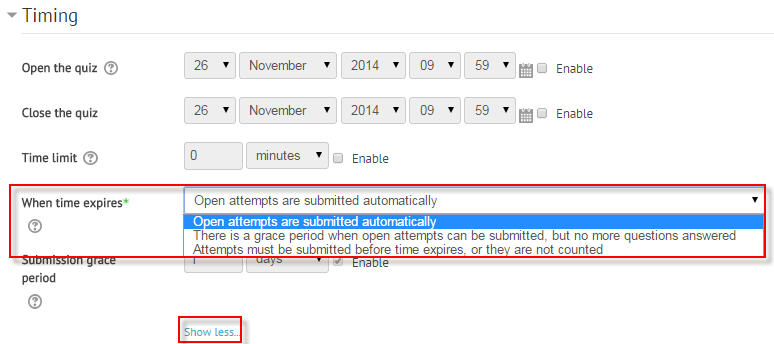
4. To enable Quiz Open and Close times, click the checkbox and set desired date and time. Here you will also decide if you want to enable a Time Limit.
* Default time expiration settings are: Open attempts are submitted automatically. If you choose to allow a grace period (check checkbox for enable) you will be allowed to set a submission grace period, where students can submit the quiz after the time limit, but can no longer answer questions.
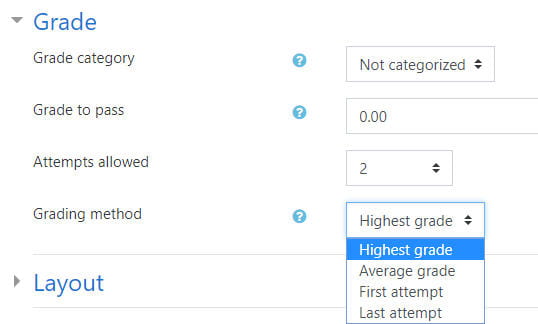
5. Expand the Grade section if you wish to change any of the following:
- Grade category – if you have setup categories (see Adding and Editing Categories in Gradebook)
- Grade to pass
- Attempts allowed
- Grading method used (if more than 1 attempt allowed)
6. Layout default settings are:
- Every new question appears on new page.
- Free Navigation method – students can go backward and forward within the quiz questions.
To change these settings, expand the Layout section.
7. Question Behavior default settings are:
- Shuffle within questions
- Deferred feedback (related directly to how students review quiz and Review options)
To change these settings, expand the Question Behavior section.
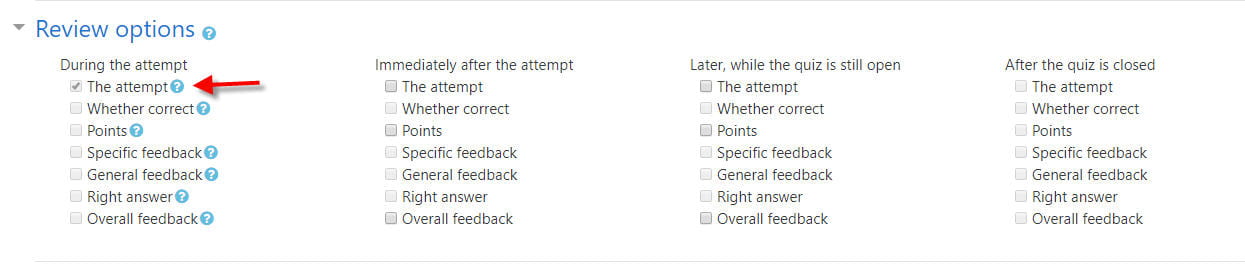
8. Review options (the default settings are set at an administrative level, but can be changed for your preferences.) **This is how and when students review their quiz/grade
Decide which feedback and results you want the students to see and at what point in the quiz-taking process.
For example, do you want the students to be able to review their answers but not see the correct answers until the testing period is over? You can update these settings at any time later, so don’t be concerned at this point if you’re not sure.
* Important to note:
- If you want students to be able to review the quiz questions, check The attempt
- If you want student to be able to see their grade, check Points
- If you DON’T set a Close Quiz time, these settings should be set under the “Later, while the quiz is still open” section.
- If you set these settings under “Immediately after the attempt“, students may be able to share answers with other students who have not yet completed the quiz.
These are the default settings (nothing checked except “The attempt” – During the attempt):
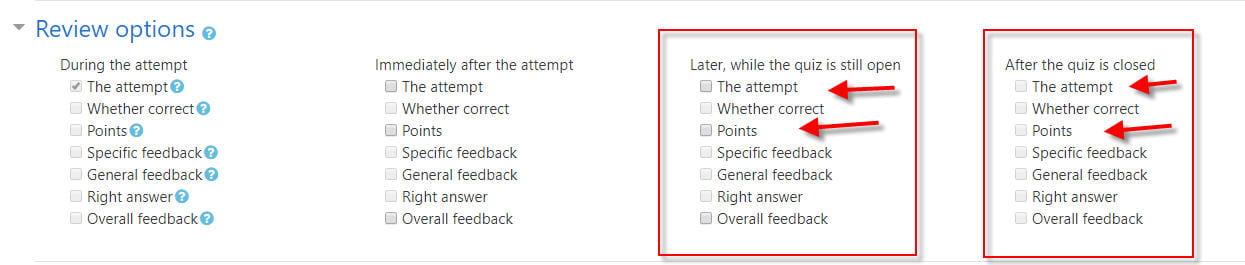
**Most instructors want to set “The Attempt” and “Points” in either Later, while the quiz is still open, or After the quiz is closed:
Quick Note: If you want to allow students to take exams on the mobile Moodle app, follow instructions below:
Mobile app enable:
- Expand the Extra restrictions on attempts section.
- Click Show More to see all settings.
- Change the Allow quiz to be attempted offline using the mobile app toggle from NO to YES.
11. Scroll through remaining settings to double check you are satisfied, then click the Save and Display button. Clicking this link will walk you through Step 2 – adding questions to your quiz.