Private Files can be accessed from the drop down menu under your profile icon/image.
Private Files allows instructors to add resources, documents, images, and links to a private repository from their computer. These files are never visible to anyone other than the instructor.
The benefit of this feature is to allow faculty to keep files they might wish to use at some point in one of their courses in one easily-accessible location.
Access Private Files from the drop down menu under your profile image/icon.
1. Add files by dragging and dropping into the provided window or click the add files icon and browse for files to upload.
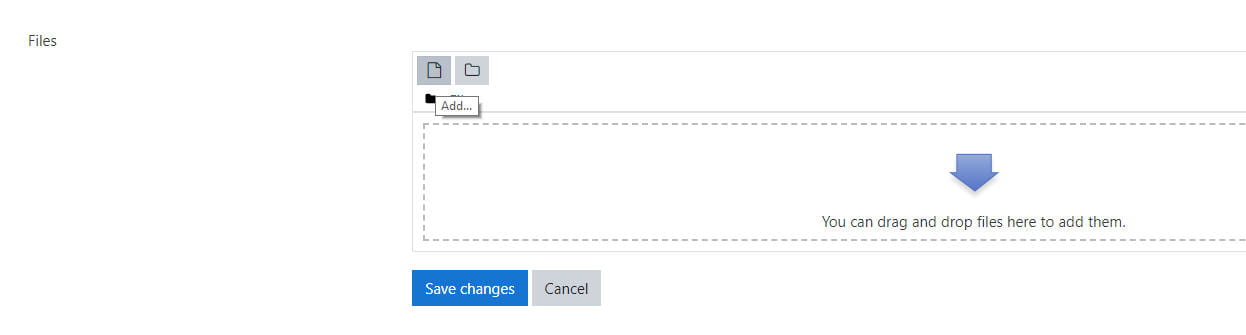
6. Click Save Changes when you are finished.
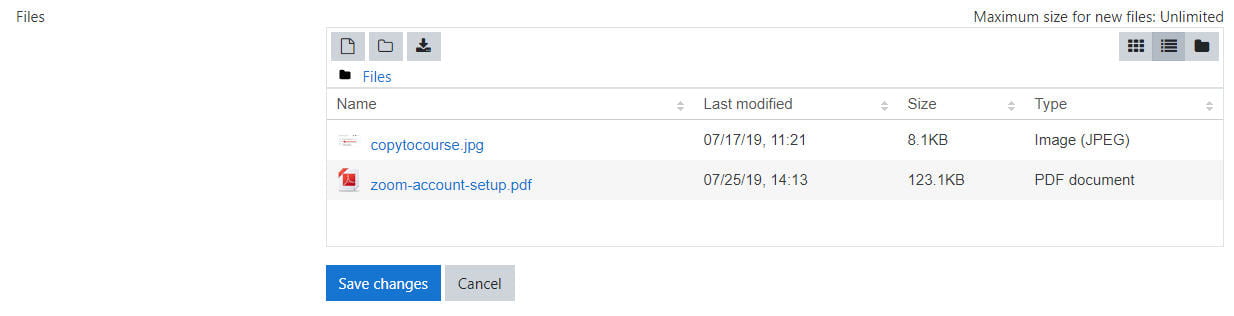
7. The Files will now be listed in your Private Files area.
To use Private Files in your course
Method 1:
1. Add the Private Files Block to your course
2. With Editing On, click Add a Block and select Private Files from the list.
3. Right-click on the file you want to point to and select “copy link address“.
4. On your course page, click Add a New Activity or Resource and select either URL, Page, Text and Media Area, etc.
5. Paste the copied URL link into either the URL area or the HTML area as a link to point to that resource.
Method 2:
- Click Add a New Activity or Resource and select File.
- Give the File a Name
- Click on the file picker icon, then Choose Private Files from the choices on the left.
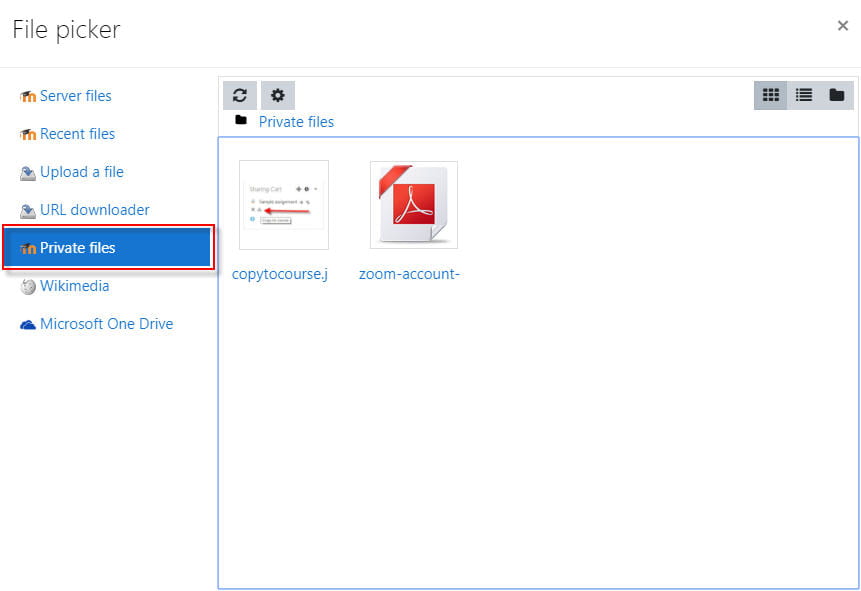
4. Select from the list of items in Private Files to add to your course page.
5. A pop up box appears asking whether you want to make a copy or create a shortcut/alias (choose one).
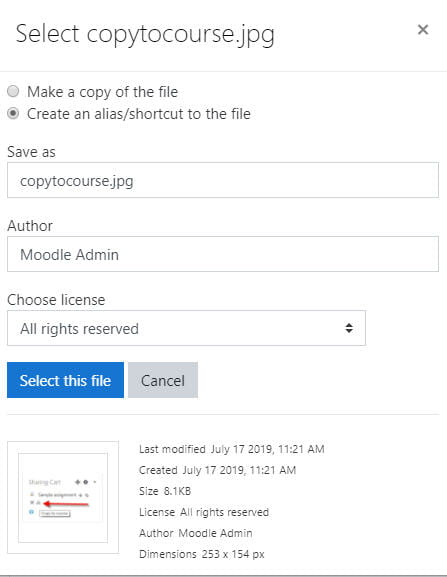 A shortcut/alias will reference this file directly, so if it changes in either place, it will be updated accordingly. A copy will be independent with regard to changes.
6. Next choose Select this file.
7. Click Save and return to course.
8. The file from Private files will now be listed in your course under the name you gave it in step 2.